
Sand Sculpting 101: What is this Fun Hobby & Getting Started
By Christopher Lequia, 9/17/2025
Got a beach, a bucket, and a wild imagination? Then you’ve got the makings of your next great art hobby.
 What is Sand sculpting?
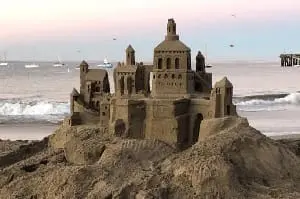
Sand sculpting is the art of shaping wet sand into castles, creatures, and jaw-dropping scenes using water, gravity, and some surprisingly simple tools. Think of it as outdoor clay work with a time limit—Play-Doh’s beach-loving cousin that prefers flip-flops and a sea breeze. The secret sauce is compaction: mix sand and water until it packs like brown sugar, then carve from the top down to reveal crisp edges and smooth curves.
The Basics
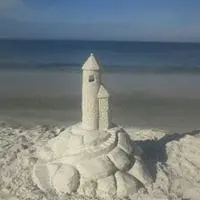
You don’t need perfect sand to succeed, but you do need the right ratio of sand to water—think “holds its shape without slumping, like a firm, wet cake.” Work top to bottom so falling grains don’t wreck the details below, and keep everything damp with a fine mist. Start with simple shapes: towers, walls, arches, then add textures, patterns, and little story elements that make people stop and smile.

- Pick your spot: close to the waterline for easy refills but high enough to survive a few waves.
- Test your sand: squeeze a handful; if it crumbles, add more water; if it oozes, add more dry sand.
- Build a solid base by packing wet sand into a bucket or form and flipping it like a cake.
- Carve top-down with small tools, mist frequently, and step back often to check your silhouette.
- Finish with textures: combs, brush bristles, and even a straw for blowing stray grains off details.
If you’re exploring art hobbies and want a low-cost on-ramp, sand sculpting is a crowd-pleaser you can practice almost anywhere—beach, lake, sandbox, or backyard bin.
Essential Gear
 Good news: you can start with a bucket and a plastic knife. Better news: a few smart tools make your sculptures stronger and sharper.
- 5-gallon bucket: For hauling water and packing forms. It’s your mixing bowl and your mold. Try a sturdy 5 gallon bucket that won’t flex when you compact.
- Shovel and trowel: Move sand fast, then shape precisely. A compact garden trowel is perfect for carving edges and smoothing planes.
- Sand sculpting tools set: Spatulas, loops, and palette knives give you clean lines and crisp details. Look for a basic sand sculpting tools kit to cover all the basics.
- Spray bottle: Moisture is control. A fine-mist spray bottle keeps surfaces carve-ready without washouts.
- Forms and molds: Stackable forms build tall, stable blocks you can sculpt like stone. Try simple sand castle forms for speedy towers and walls.
- Detail straw or blower: Gently blow loose grains off delicate features. Drinking straws work like a charm.
- Kneeling pad: Your knees will thank you. A cushy garden kneeling pad keeps you comfy while you finesse the base.
- Shade or canopy: Sun dries sand fast; shade buys you time. Pack a portable beach canopy if you’re building for hours.
 Quick win: bring extra water and a second spray bottle—running out mid-carve is how great towers become modern art.
Glossary
- Compaction: Packing wet sand tightly so it behaves like firm clay and holds crisp edges.
- Form: A bucket, box, or ring you fill and pack to create a solid block for carving.
- Pound-up: The process of filling and compacting forms to make your “sand bricks.”
- Top-down carving: Carving the highest parts first so debris doesn’t wreck finished details below.
- Plinth: A sturdy base or platform that supports your sculpture, like a pedestal.
- Relief: Designs carved into a flat face so shapes pop out without being fully 3D.
- Undercut: Carving beneath an overhang; dramatic, but risky if the sand isn’t compacted well.
- Sloughing: When the surface starts sliding off because it’s too dry or not compacted enough.
- Buttering: Smoothing a surface with thin layers of damp sand for a clean finish.
- Feathering: Light, quick strokes to blend surfaces or soften transitions.
- Finishing pass: The final clean-up carve that sharpens edges and removes stray grains.
- Drip castle: A playful technique where super-wet sand “drips” into spires—easy, whimsical, and great for beginners.
- Negative space: The open gaps and holes that make designs look lighter and more dramatic.
- Crenellation: Those castle-top notches—instant medieval vibes with a few careful cuts.


